



 Digital Downloads
 Computer & Accessories
 Mobile & Gadgets
 Networking & Server
 Smart Home

Getting started with ilmCode Commerce
For customers who just bought a license. This walks you through installing the shop on your own hosting and the first settings to fill in. If you get stuck, write to support@ilmcode.com — we're happy to help.
What you already have
Check your email (and your client area — My License) for:
- License key — looks like
ILMC-XXXX-XXXX-XXXX-XXXX - Auth key — looks like
ILMA-XXXX-XXXX-XXXX-XXXX-XXXX - The domain your license is bound to (you can change this later from the same page)
- A Download ZIP button — this is the software itself
Both keys are needed to activate the software. Keep the auth key private, the same way you would a password.
Before you start: hosting requirements
- PHP 8.2 or newer
- A MySQL or MariaDB database
- These PHP extensions turned on:
openssl, pdo, pdo_mysql, mbstring, tokenizer, json, curl, fileinfo, gd, ctype, xml
Most shared hosting, aaPanel and cPanel servers already have all of this. If you're not sure, ask your host to confirm PHP 8.2+ with the extensions above.
Installation
Step 1 — Download and upload
- Sign in to your client area → My License, click Download ZIP.
- Create the website/domain in your hosting panel first, with an SSL certificate (Let's Encrypt is fine) and Force HTTPS turned on.
- Upload the ZIP into the site's folder and unpack it there — the document root should be the site folder itself, not a public subfolder inside it.
- Most panels: File Manager → upload → right-click → Extract.
- If you have SSH access instead:
cd /path/to/your/site
unzip -q ilmcode-ecommerce-*-full.zip && rm ilmcode-ecommerce-*-full.zip
chmod -R 775 storage bootstrap/cache public/uploads
Step 2 — Open your domain: the installer runs itself
Visit https://your-domain.com. It opens the installer automatically and walks you through six short steps:
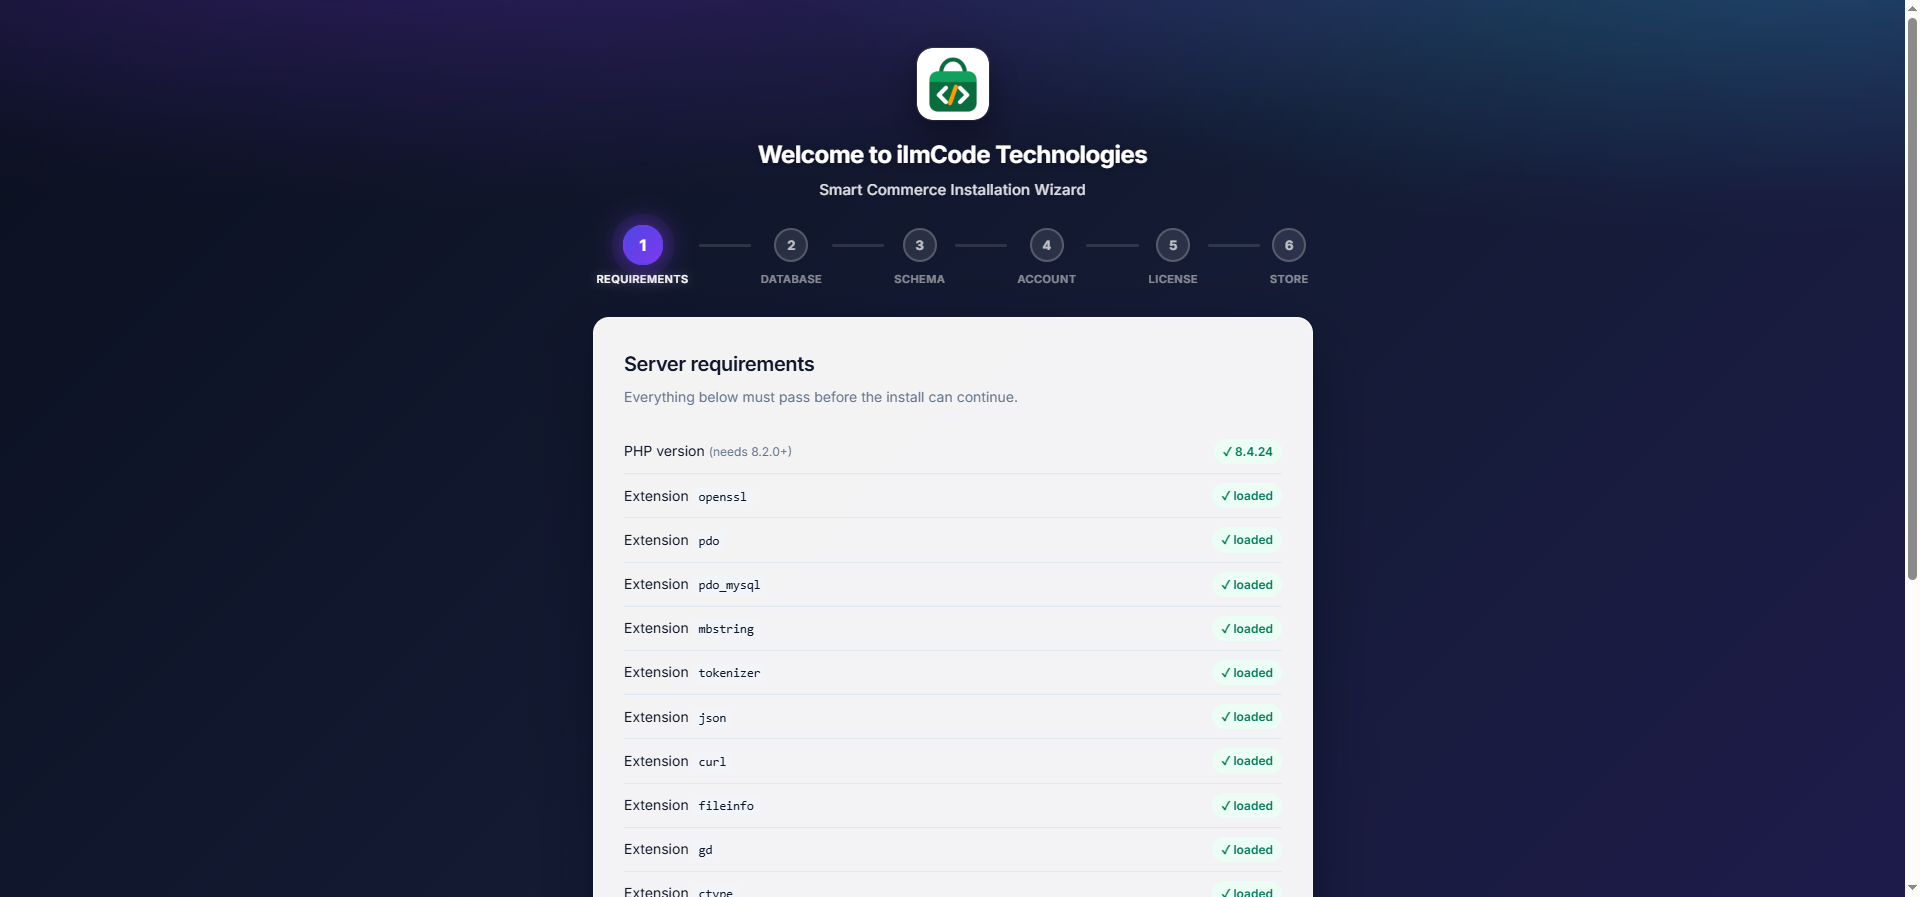
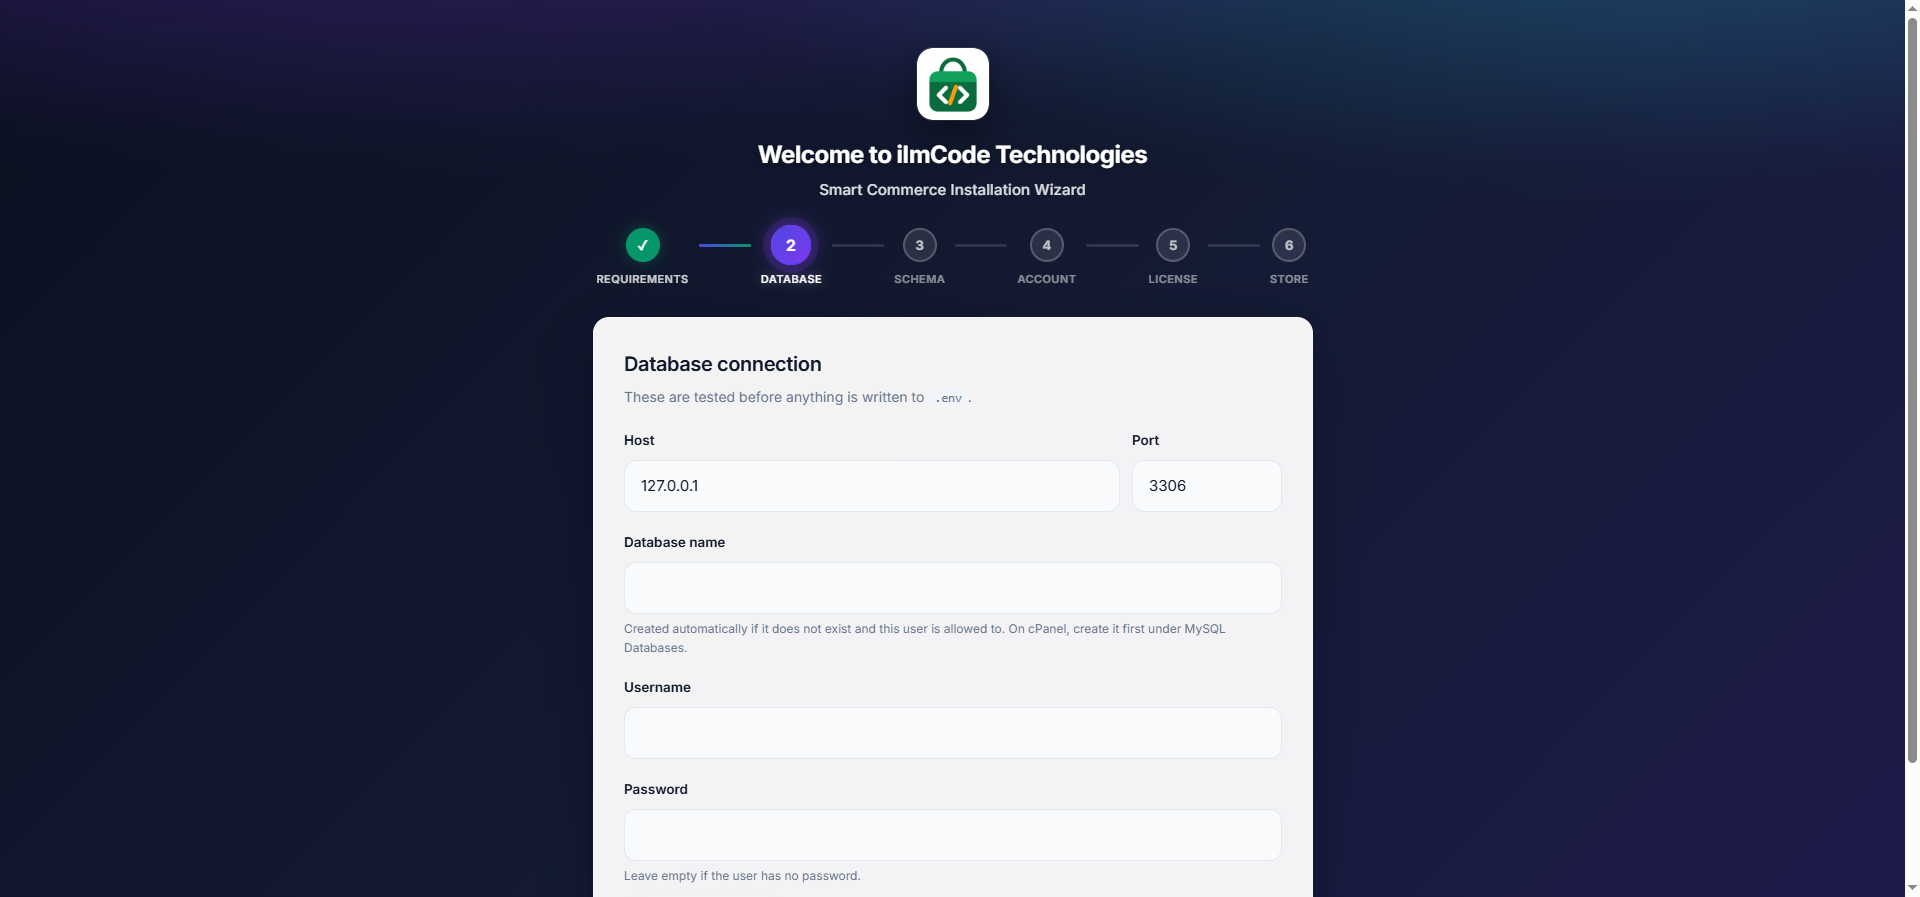
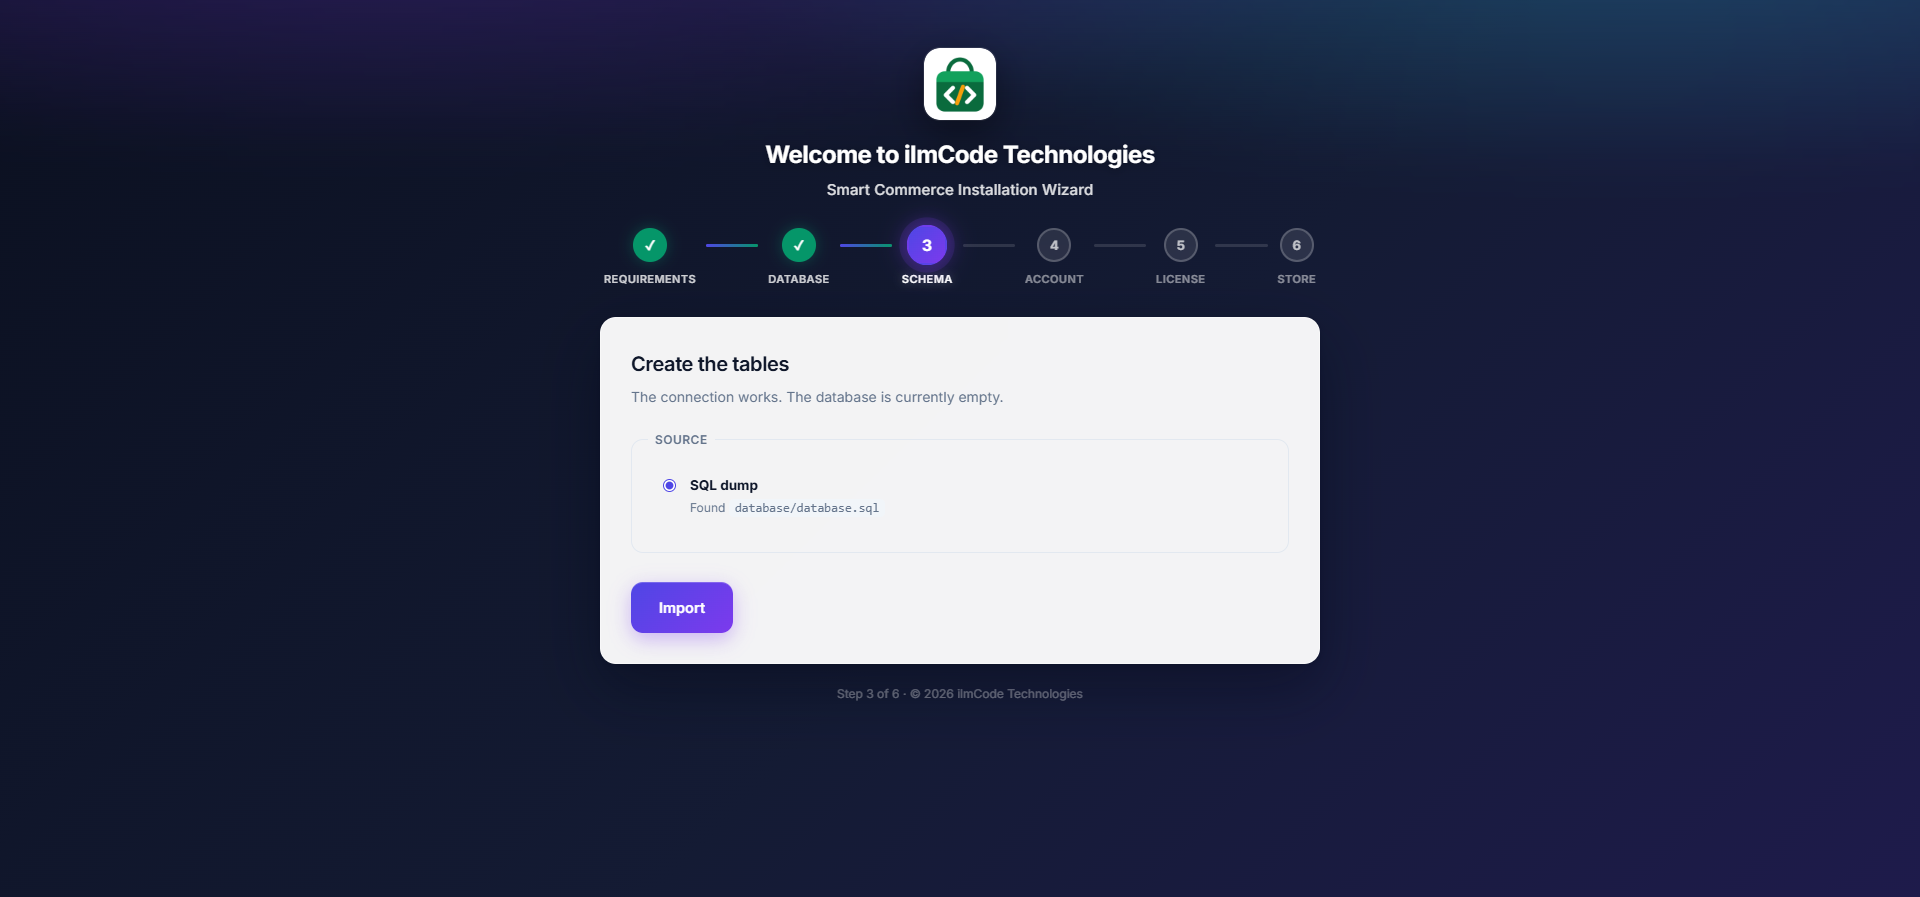
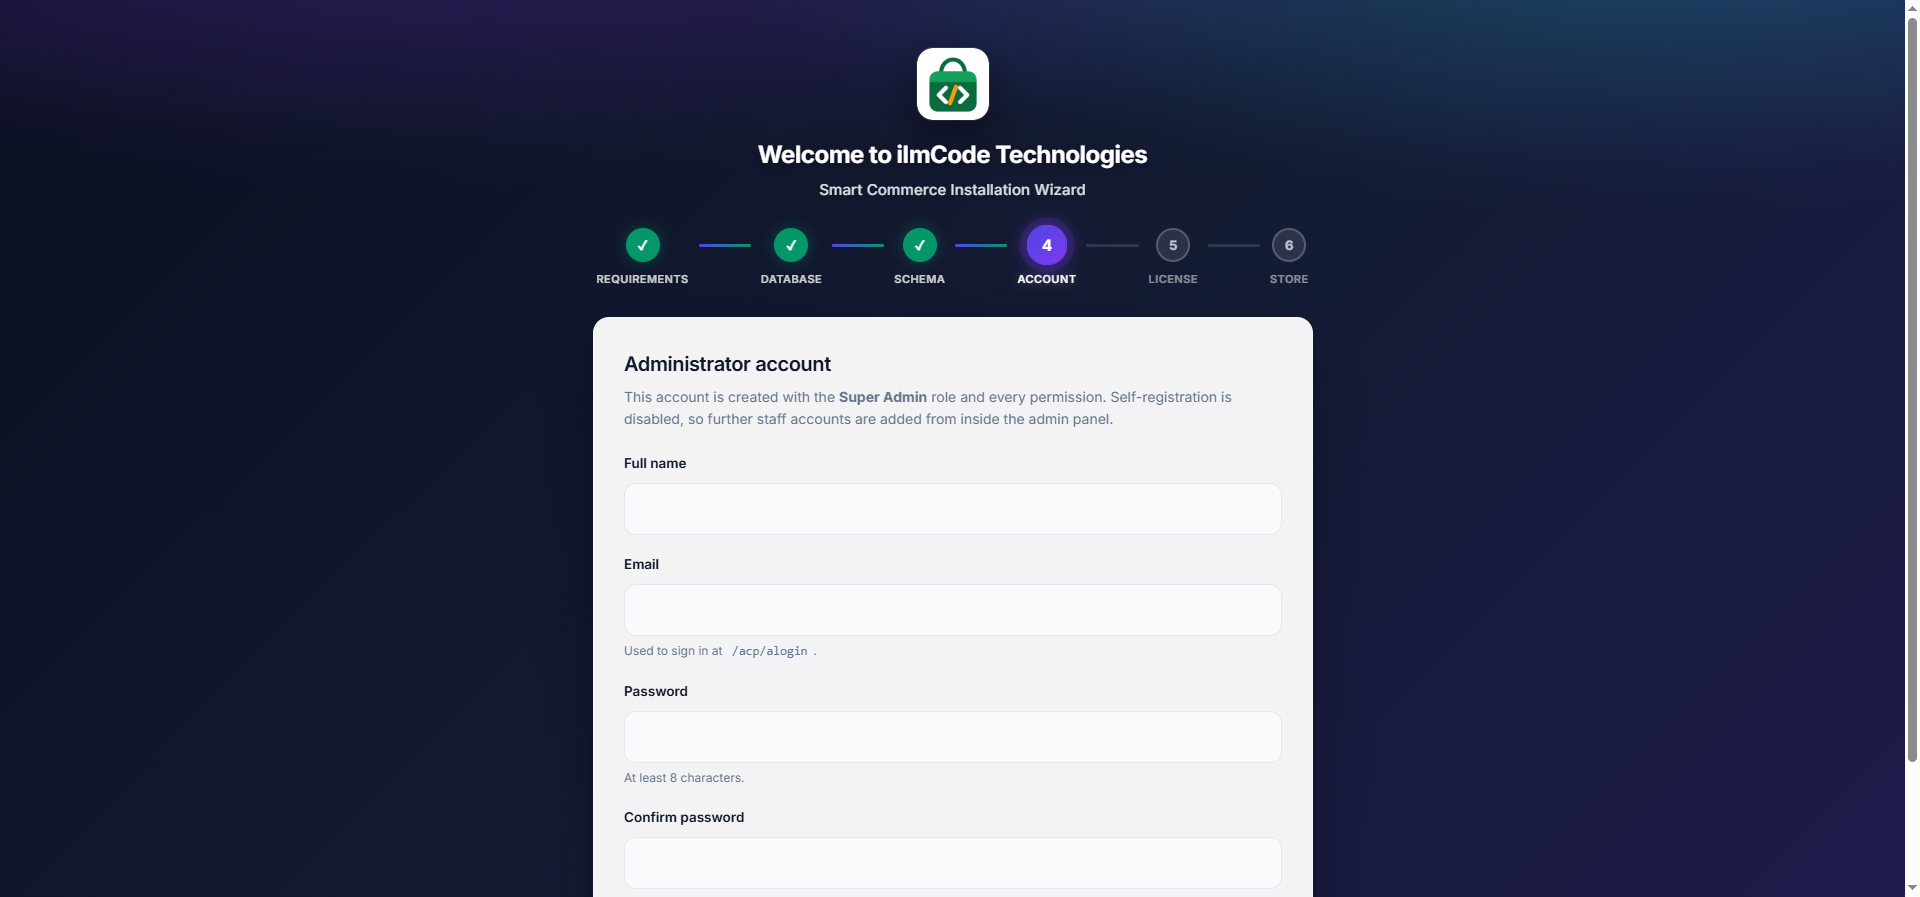
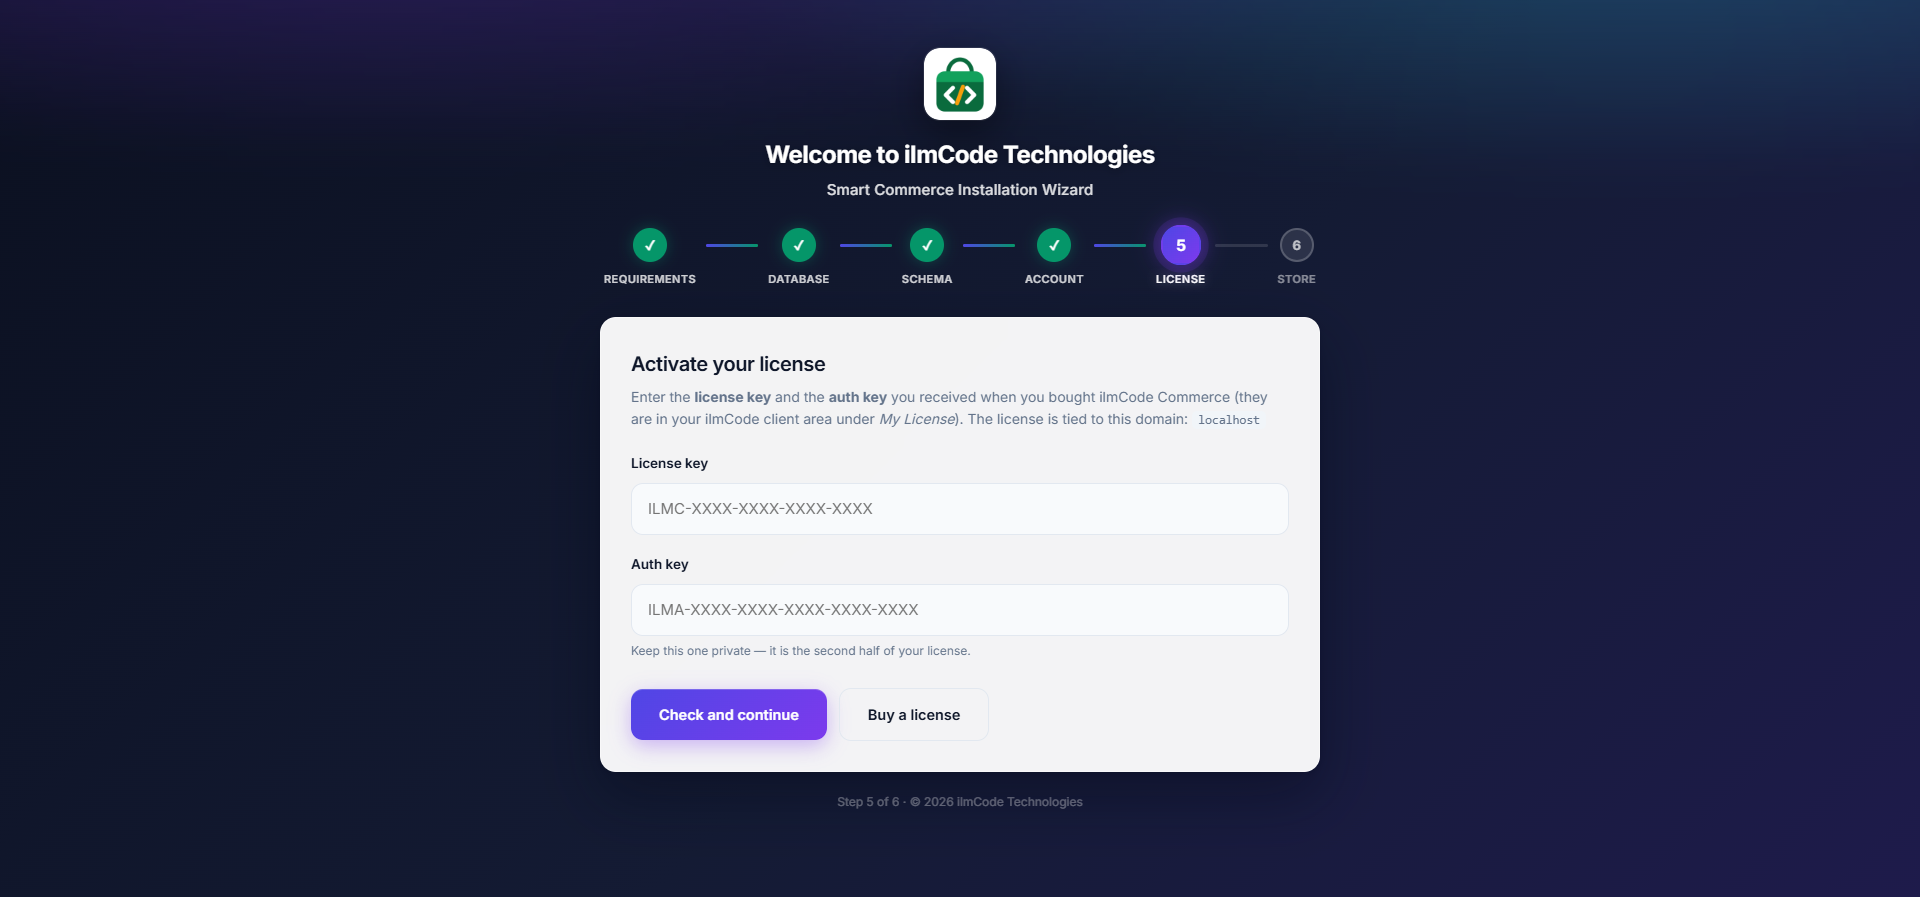
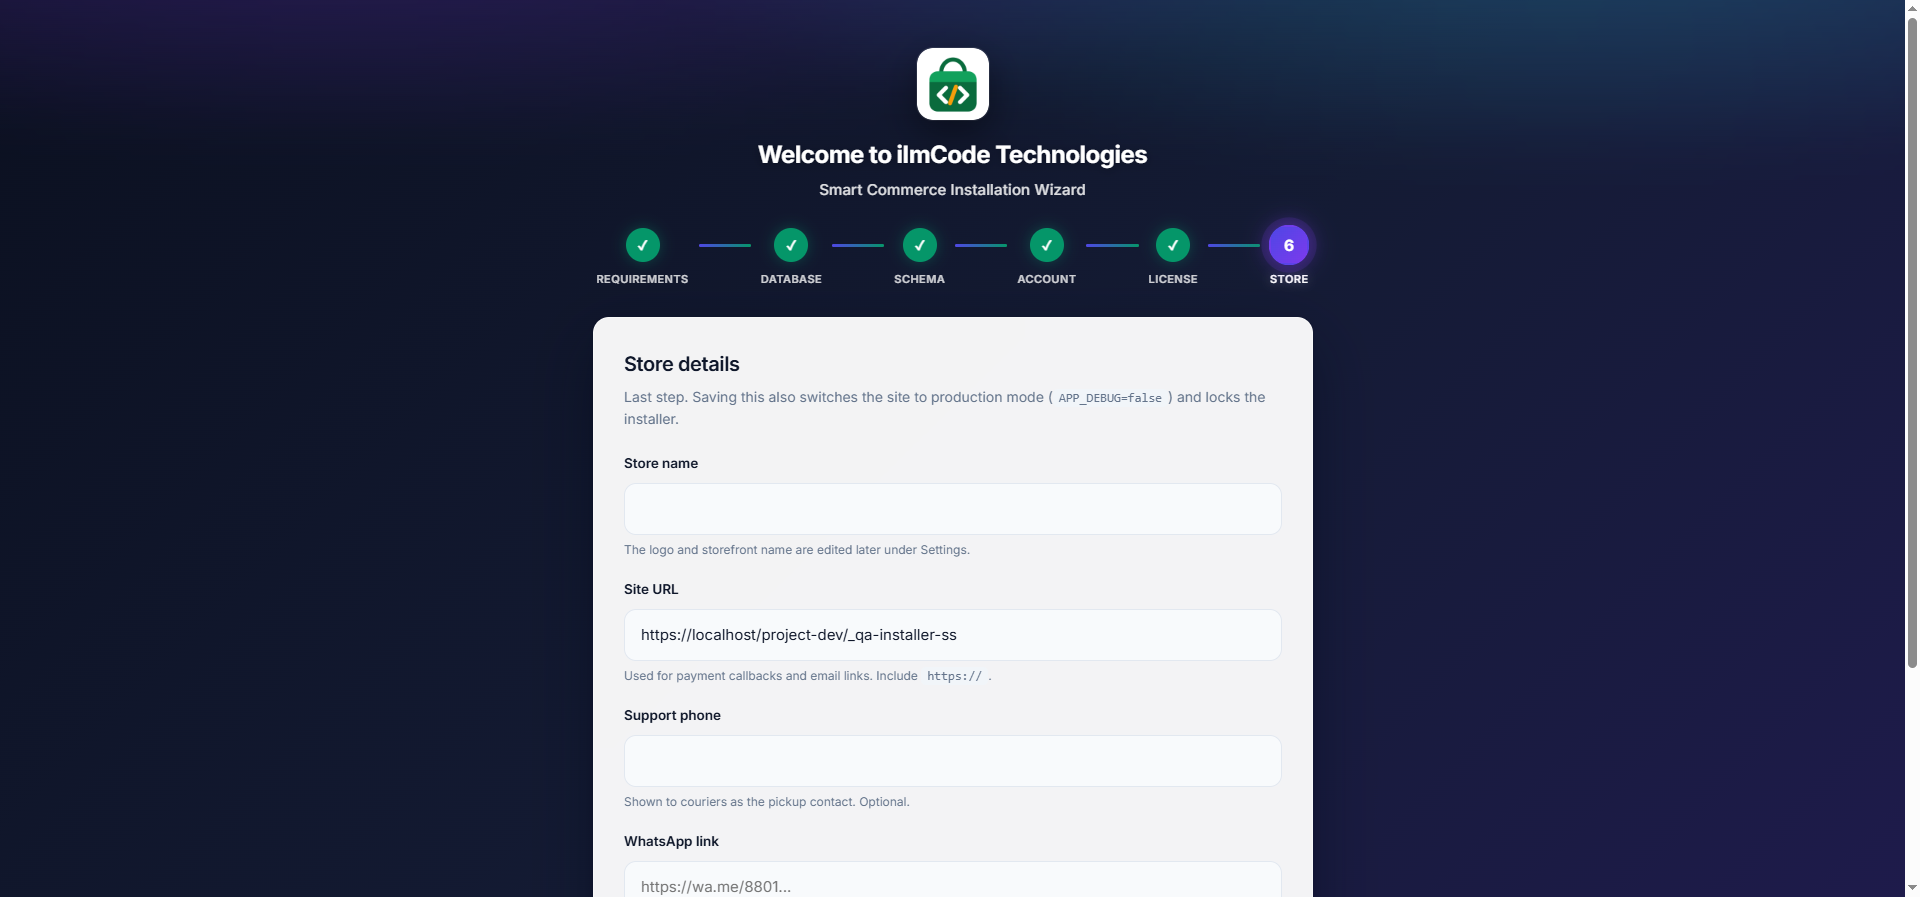
That's it — the installer locks itself once step 6 is done, and you're taken to your new admin panel.
Admin login: https://your-domain.com/acp/alogin
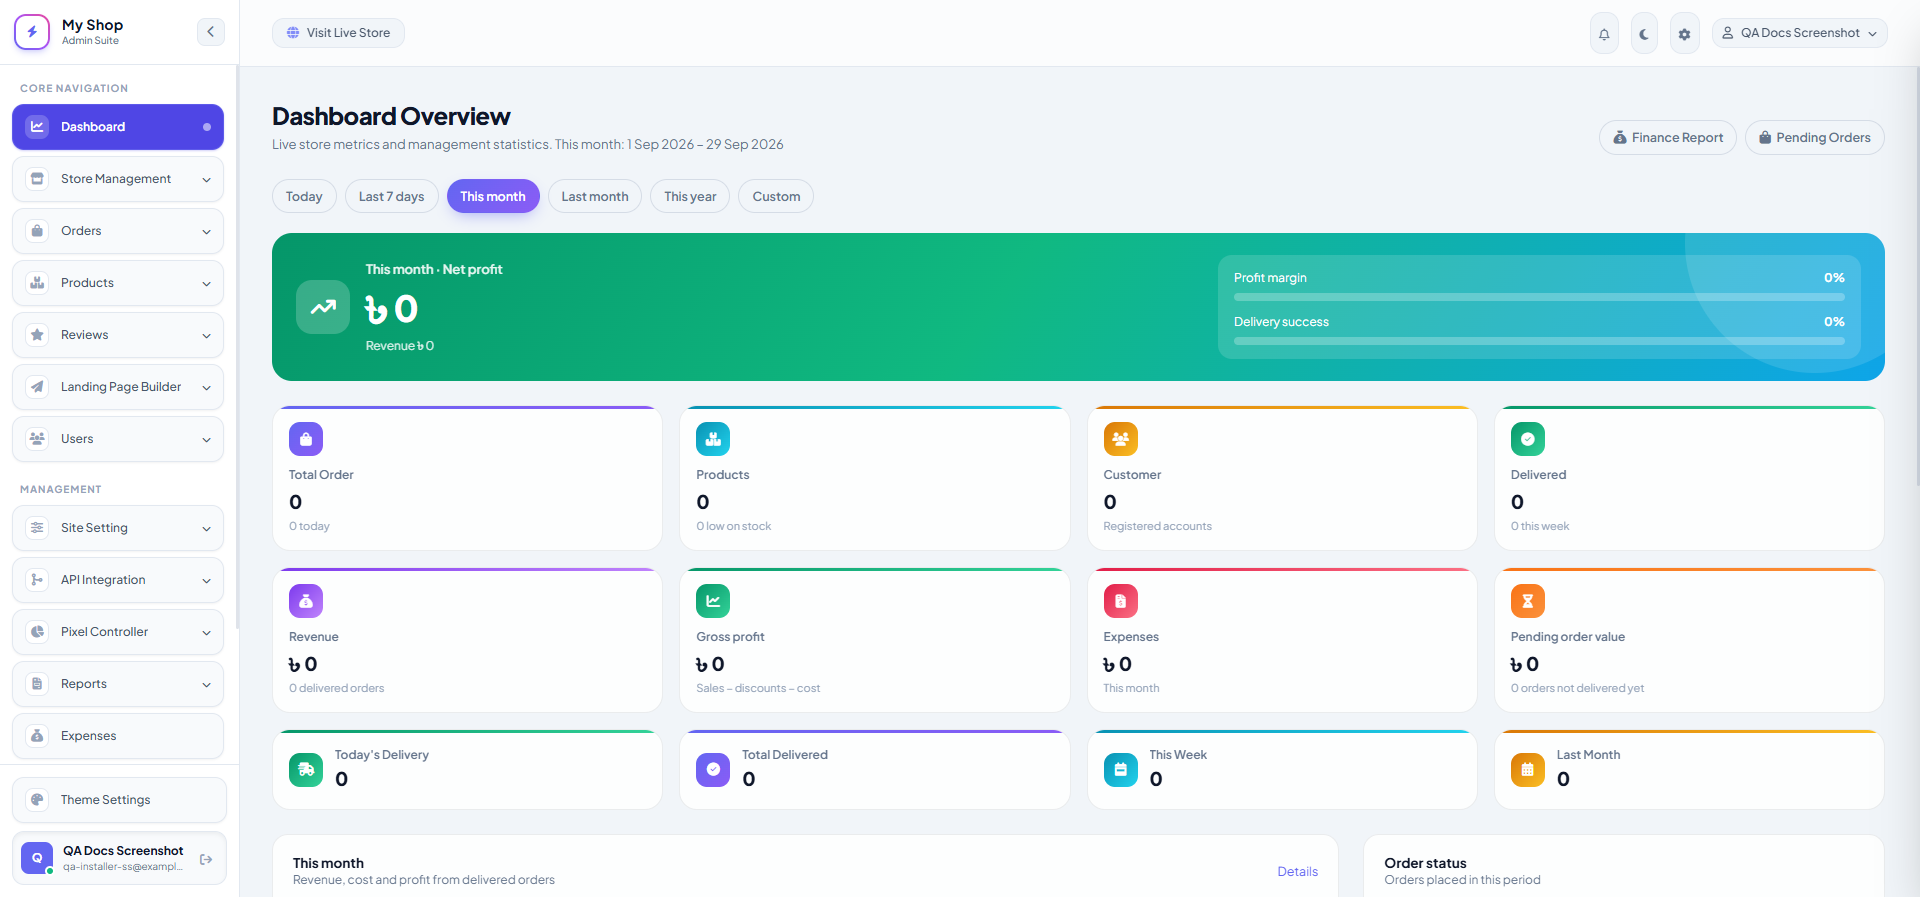
The first things to set up
Once you're signed in, Site Setting → General Setting has everything on one tabbed page:
| Tab | What to do |
|---|---|
| Business | Your business name, tagline, and the language for the site/admin. |
| Logo & favicon | Upload your own logo — replaces the default one everywhere. |
| Contact | Phone, address, and the contact details shown on your site. |
| Payment | Turn on the payment methods you accept (cash on delivery, bKash, Nagad, bank transfer...). |
| Delivery | Set your delivery/shipping charges by area. |
| Fill in your mail server details — needed for "forgot password" emails to actually send. Use Send test to confirm it works. | |
| License | Should already show active from install — this is also where you'd re-enter your keys if you ever move the shop to a new domain. |
A few more one-time things, found under API Integration in the sidebar:
- Courier API — add your Steadfast / Pathao keys if you want to book deliveries straight from an order.
- SMS Gateway / WhatsApp Business API — if you want order updates sent by text or WhatsApp.
One thing your host needs to do for you: a scheduled task, so courier status updates run automatically:
* * * * * cd /path/to/your/site && php artisan schedule:run >> /dev/null 2>&1Most panels have a "Cron Jobs" section where you can paste this in — ask your host if you're not sure how.
After that, you're ready to sell
Add your categories and products (Products in the sidebar), arrange your home page with the Home Page Builder (no code needed — drag, drop, save), and start taking orders.
Basic knowledge
New to running an online shop, or new to this panel? These are the terms and ideas you'll run into most, explained in plain language.
Domain, hosting and SSL — what they actually are
- Domain — the address people type to reach your shop (e.g. yourshop.com). You buy this separately, from any domain registrar — it is not included with hosting.
- Hosting — the computer your shop's files and database actually live on, running all the time so your site is reachable. This is where you upload the ZIP.
- Pointing the domain — telling your domain where your hosting is, usually by setting its "A record" (or nameservers) in the domain registrar's panel to your hosting's IP address. This can take a few hours to a day to fully take effect worldwide ("DNS propagation").
- SSL certificate — what makes your shop load as https:// with a padlock icon, instead of the unencrypted http://. Most panels (aaPanel, cPanel) issue a free one (Let's Encrypt) in one click once your domain is pointed correctly.
How the catalogue is organised
Three levels, each optional below the top one: Category → Subcategory → Child category. A product belongs to one category (and optionally a subcategory/child category), plus can have its own brand, colours and sizes. Combo offers bundle products together at a special price; coupons are codes customers type in at checkout for a discount.
An order's real journey
Every order moves through these statuses, in order (you can also mark one Cancelled or Return at any point):
- Pending — just placed, not yet looked at.
- Received — you've seen it and accepted it.
- Processing — you're packing it.
- Ready to Ship — packed, waiting for pickup.
- On Courier — handed to Steadfast/Pathao (or your own delivery), tracking code attached.
- Delivered — the customer has it — this is what counts towards your revenue reports.
Building your home page
The Home Page Builder (under Store Management) is a stack of blocks you add, remove and re-order without touching code: a slider, category rails, product grids, deal timers, banners, text sections and more. Save, and the change is live immediately.
Getting the word out
- Landing Page Builder — a focused, single-product page for a specific campaign or ad, separate from your normal storefront.
- Pixel Controller — add your Meta (Facebook) and TikTok pixel IDs, plus a Google Tag Manager container, so your ad campaigns can track real purchases.
Reading your numbers
Finance, stock and order reports (under Reports) all filter by date range and export to Excel/CSV when you need the raw numbers elsewhere — no need to calculate anything by hand.
License & Updates
Keeping your license active
Your shop checks in with our license server automatically every 24 hours — nothing for you to do. If your internet or our server is briefly unreachable, the shop keeps running for 7 days on the last successful check before anything is affected, so a short outage never stops your sales.
Getting updates
New versions show up right in your admin: Site Setting → General Setting → System update tab shows your current version and what's new. Updates never touch your .env, your uploaded pictures, or your database — only the application code.
If something goes wrong
| What you see | What it means |
|---|---|
| Requirements page shows something red | That PHP extension isn't on, or your PHP is older than 8.2 — ask your host to enable it / upgrade. |
| "database does not exist, and this user is not allowed to create it" | Create an empty database yourself in the hosting panel first, then continue. |
| A 500 error page | Ask your host (or us) to check storage/logs/laravel.log for the reason. |
| Styles and images missing after install | The document root was pointed at the public folder — it should point at the site folder itself, one level up. |
| The License step won't accept your keys | Double check you copied both keys fully (no extra spaces), and that the domain you're installing on matches the one your license is bound to — you can change the bound domain from My License in your client area. |
Still stuck? Email support@ilmcode.com with your domain and what you tried — we'll take it from there.